
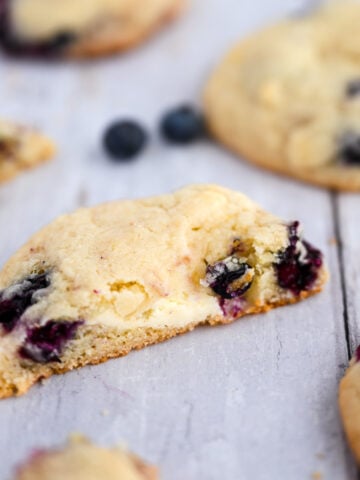
This Key Lime Cookies recipe is everything you didn't know your heart desired. They are soft and chewy; the absolute perfect texture and full of that delicious tangy key lime flavor. No need to go to Key West, just hit up your local grocery store for the ingredients.

Why This Recipe is the Best
These are popular mostly in the spring and summer, but we love to whip them up towards the end of January and in February when we are ready for winter to be over and spring to arrive. Great for Cinco de Mayo and Easter. We also think that with their green tint (you can add some green food coloring too!), they are also perfect for celebrating St. Patrick's Day.
This was inspired by Trader Joe's and our Lemon Cookies, and goes great with our Strawberry Lemon Cookies or our Key Lime Pie.
Jump to:
Key Ingredients
Below is a list of ingredients needed for this recipe. Follow our tips on each ingredient for best results.

- Key lime zest- I like to use a microplane for the best results. We tested this recipe with regular lime zest as well as key lime zest. While the flavor was better with key lime zest, it worked fine with regular limes. Do not substitute any of the juice, though!
- Egg- Use a large egg. Room temperature eggs are best for baking!
- Key Lime Juice- You can use fresh-squeezed for the best flavor, or bottled will work fine in this recipe too. We tested this recipe with regular lime juice, and it was not good. We tried it with partial lime juice and partial key lime, and it still wasn't good. All of the juice in these cookies needs to be key lime juice.
How to Make Key Lime Cookies
Use these process shots to help get the results you want. The pictures can help with texture and be a visual guide for the best results.

- Preheat oven to 350° F. Combine the softened butter and sugar and beat on high for at least 2 minutes, and up to 3 minutes. Beat until the mixture is light and fluffy and well combined. Scrape down the sides of the bowl.

- Add the egg and beat until combined, about 30 seconds. Add the vanilla, key lime juice, and key lime zest. Beat on medium until well combined. Scrape down the sides of the bowl and combine.

- Add the flour, baking soda, baking powder, and salt. Mix on low, just until combined. It's a slightly wetter dough than chocolate chip cookies.

- Line a baking sheet with parchment paper and scoop out dough balls around 1 ½" in diameter, or use a medium-sized cookie scoop. Smooth the dough balls out before baking for a smoother finish. This is for looks only and will not affect the taste or texture.

- Bake at 350° F for 9-11 minutes. Bake until the tops are matte and the edges are set. No need to wait for them to be golden, or they will be overcooked and crumbly! Let sit on the baking sheet 5-8 minutes, then move to a cooling rack.

- After the cookies have cooled, whisk together the key lime juice and powdered sugar in a bowl. You may need to add more to get the desired consistency. We like ours thick enough not to seep into the cookie, and thin enough to get a good drizzle. Drizzle the glaze over the top of the cooled cookies. Allow to set up (around 5 minutes then enjoy!
Hint: Don't leave them sitting on the baking sheet for more than about 10 minutes, or they will start to dry out. Also, don't add glaze until the cookies are cooled, or it will absorb into the cookie.
Common Mistakes
We love these cookies, and I make them all the time in the spring and summer months. One time when I was making them, I ran out of key lime juice and only needed a couple of tablespoons more. I didn't feel like going to the store and substituted regular lime juice for the missing 2 tablespoons. They weren't good, and I could tell. No one wanted to eat them, whereas they normally don't last longer than a day!

Top tip
Do not over-bake the cookies! They will be dry and crumbly. As soon as the tops are matte and the edges are set, these are done! Allow them to cool on the baking sheet and finish cooking/ setting up for 5-8 minutes.
Recipe

Key Lime Cookies
Ingredients
Cookies
- ⅓ cup butter I used salted
- 1 cup granulated sugar
- 1 egg large
- ½ teaspoon vanilla
- zest from 1 key lime
- ¼ cup key lime juice fresh squeezed for best flavor
- 2 cups flour
- ¼ teaspoon salt
- ¼ teaspoon baking powder
- ¼ teaspoon baking soda
Glaze
- 1 Tablespoon key lime juice
- ½ cup powdered sugar can add 2 Tablespoons more powdered sugar for a thicker glaze.
Instructions
Cookies
- Preheat oven to 350° F. Beat together the butter and sugar on high until light and fluffy, about 2-3 minutes. Add egg and beat until combined. Add key lime zest, key lime juice and vanilla and beat until well combined. Scrape down the sides and combine.

- Add flour, salt, baking powder, and baking soda. Mix on low just until combined. The dough is much looser than normal cookie dough. See process photo above for a picture of the texture.
- Line a baking sheet with parchment paper and scoop out dough balls about 1 ½" in diameter on the sheet. Allow room for them to spread while baking. Bake until the edges have set and the tops are matte, about 10-12 minutes. Do not wait for them to turn golden or they will be dry! Remove from oven and allow to finish cooking for 5-8 minutes. Transfer to a cooling rack.


Glaze
- Whisk together the key lime juice and powdered sugar together in a small bowl. Add more powdered sugar if needed. The glaze should be thick enough that it won't seep into the cookie and thin enough to get a good drizzle. See picture above in step by step instructions for reference.
- Drizzle glaze over cooled cookies and Enjoy!!


Notes
- Store in an airtight container at room temperature for up to 3 days. It will take longer for them to go bad, but the texture will be compromised.
- Store in the freezer for up to 2 months. I like to freeze them when they are fresh and still oh so slightly warm for maximum softness upon defrosting.
- Tip: Do not over bake! For the perfect texture, remove from oven as soon as the tops are matte and the edges are set. This will create a cookie that is juuuuuuuust barely done in the center. For a more done cookie, cook an additional 2 minutes after the tops are matte and the edges are set. They won't be quite as soft and chewy.
- Tip: Wait until the cookies have cooled completely to add the glaze or it will seep into the cookie.
- Do Not substitute regular lime juice, even for just a portion of this recipe. It doesn't taste right and you will be disappointed in your cookies.
Nutrition
Variations
We love switching things up when we're in the kitchen. Try any of these variations for something a little different.
- Spicy - Sprinkle some Tajin on top before the glaze has a chance to solidify.
- Mexican Lime Cookies - before baking, roll into balls and coat in powdered sugar. Skip the glaze. Roll in powdered sugar again after they have baked and cooled.
- Coconut Lime Cookies -stir ½ cup shredded coconut into the cookie dough after adding the flour. Feel free to sprinkle some on top while the glaze is still wet, too.
- Lime Cookies - make these plain lime by using regular limes and regular lime juice. Side note about plain lime: We've tried it this way, and all of our taste testers preferred key lime and thought the regular lime was not good.
- Lemon Lime Cookies - keep the key lime juice, and substitute half the juice and zest with lemon juice and zest. We like to call them Margarita Cookies.
Storing Key Lime Cookies
Store the cookies in an airtight container at room temperature for up to 3 days. Store in an airtight container in the freezer for up to 2 months. When freezing, I like to put them in the freezer when they are still oh so slightly warm.


Nicole says
Our family LOVES this Key Lime Cookies recipe. The cookies are truly heavenly- they have the best taste and texture!
Holle says
Some clue as to how long to cook these cookies would be helpful. I can say 8 minutes will have the edges set and top matte but the inside is NOT DONE! Also, I had to refrigerate the dough several hours before it would form a ball. Can anyone advise, please?
Nicole says
Hi Holly, it sounds like we may be located at different elevations. Try adding 1/4 cup of flour. The dough is loose and won't form great dough balls, more like dough mounds. Thank you for pointing out the discrepancy in the recipe card, the bake time is about 10-12 minutes. I could have clarified that the tops need to be completely matte. Sometimes part or most of the cookie will be matte, but you want to make sure the entire top of the cookie is matte. Hope you have better luck next time 🙂
Molly says
Soo delicious and summery -- though I definitely underbaked them! I made half without glaze, then combined the leftover glaze with yogurt and froze to make some pretty great popsicles.
Nicole says
yummmm I'm going to have to make those popsicles next time I make these cookies- great suggestion! So glad you enjoyed them 🙂
Vivian says
The flavor of these are really good. My batter wasn’t loose as the notes say and my cookies didn’t flatten out like the picture. I also noticed that the recipe calls for one egg and the directions say to add eggs (plural) not sure if more than one egg is supposed to be used. Will definitely make again!
Nicole says
Thank you so much for pointing out the "eggs" in the recipe card! There is only one egg. We're so glad you enjoyed the cookies and will make them again! It sounds like there might be a little extra flour in your dough. When measuring the flour, make sure to fluff it up, then spoon it into the measuring cup, then scrape across the top. Or if you have a scale, it should be about 125 grams of flour per cup.
Allison says
Made these for a cookie swap with friends and they turned out so cute and delicious!! Thank you for sharing!
Nicole says
We're so glad you enjoyed them!
Cain says
These cookies are the best. I've made them for family, friends, coworkers, and now they are my go-to cookie. Everyone wants more of them!
Nicole says
Yay!! We're so glad you love them as much as we do! 🙂